第一章=>
一、概述
二、环境
三、人人系统
四、分布式组件
五、前端基础
第二章=>
六、分类维护API
七、品牌管理API
八、属性分组API
九、平台属性API
十、新增商品
第三章=>
十一、仓储服务
十二、分布式基础篇总结
第四章=>
13、全文检索ES
14、商城上架
15、性能压测
16、缓存
17、检索服务
第五章=>
18、异步
19、商品详情
20、认证服务
21、购物车
22、消息队列
第六章=>
23、订单服务
24、分布式事务
25、订单服务-2
26、支付
27、订单服务-3
第七章=>
28、秒杀服务
29、Sentinel
30、Sleuth
31、k8s
32、kubesphere
第八章=>
33、集群
34、部署
35、流水线
36、部署-2
37、最终部署
****************************************************************************************************************************************************************************
一、概述
1、说明
【1】基础篇-全栈开发篇:springboot+springcloud+docker 逆向工程
【2】高级篇-微服务架构:订单、结算、秒杀....
【3】高可用-架构师提升:k8s   一主两从  CI/CD流水线部署  各种技术集群
************************************************************************************
nacos/sleuth/prometheus/rmq队列/redis/mysql
k8s集群
【4】项目背景:B2B B2C  C2B C2C  O2O
【5】项目技术+特色
前后端分离开发 基于vue的后台管理系统
springcloud解决方案
微服务治理方案
分布式事务、分布式锁
高并发的编码方式、线程池、异步编排
压力测试与性能优化
各种集群的部署
CI/CD使用
...
【6】前置要求
springboot
springcloud
git maven
linux redis docker
html css js vue
idea开发
win10操作系统
2、项目整体效果演示
【1】前端后台管理系统演示
【2】sentinel限流演示  阳哥也讲过,但是没应用
【3】链路追踪
【4】k8s集群篇  cicd集群部署---自动化流水部署
【5】站下上帝视角看JAVAEE的全貌
3、分布式概念
【1】微服务是一种非常流行的架构风格
【2】分布式系统是若干计算机的集合
【3】远程调用:服务之间的互相调用 HTTP+JSON、天然的跨平台
【4】负载均衡:订单----商品(集群)
【5】服务发现与注册中心Nacos
【6】配置中心
【7】服务熔断和降级:雪崩现象
【8】API网关
4、架构图解释
【1】客户端---nginx---gateway---认证、降级、限流---redis---mysql---rmq---es---阿里oss
---elk日志---kibana---nacos---seluth---promethus---ci/cd---k8s
【2】一张图示例
****************************************************************************************************************************************************************************
二、环境
1、快速创建虚拟机
【1】推荐使用VirtualBox
【2】Vagrant init centos 7(我是手动安装的)
2、配置虚拟机网络
vim /etc/ssh/sshd_config
************************************************************************
看Springboot高级里的详细配置
3、安装docker
【1】虚拟化容器技术
【2】docker基于镜像,可以启动各种容器,每一个容器都是一个完整的运行环境,容器之间互相隔离。
【3】docker去镜像市场下载iamges
【4】运行环境:容器都是相互隔离的
sudo yum remove docker \
docker-client \
docker-client-latest \
docker-common \
docker-latest \
docker-latest-logrotate \
docker-logrotate \
docker-engine
************************************************************************
sudo yum install -y yum-utils \
device-mapper-persistent-data \
lvm2
************************************************************************
sudo yum-config-manager \
--add-repo \
https://download.docker.com/linux/centos/docker-ce.repo
************************************************************************
sudo yum install docker-ce docker-ce-cli containerd.io
************************************************************************
sudo systemctl start docker
************************************************************************
sudo systemctl enable docker
************************************************************************
docker images
4、配置 docker 镜像加速
【1】推荐使用阿里云
https://cr.console.aliyun.com/cn-hangzhou/instances/mirrors
************************************************************************
sudo mkdir -p /etc/docker
sudo tee /etc/docker/daemon.json <<-'EOF'
{
  "registry-mirrors": ["https://vtaihzzp.mirror.aliyuncs.com"]
}
EOF
sudo systemctl daemon-reload
sudo systemctl restart docker
************************************************************************
vim /etc/docker/daemon.json
打开后里面的配置才是重点
5、docker安装mysql
【1】下载镜像
docker pull mysql:5.7
************************************************************************
检查是否下载成功
docker images
【2】创建实例并启动
docker run -p 3306:3306 --name mysql \
-v /mydata/mysql/log:/var/log/mysql \
-v /mydata/mysql/data:/var/lib/mysql \
-v /mydata/mysql/conf:/etc/mysql \
-e MYSQL_ROOT_PASSWORD=root \
-d mysql:5.7
************************************************************************
返回这个证明OK了
98e19c133c51259318614bc5e54676104b4d3eb33b246a32a24edc7359c372e2
************************************************************************
然后就可以连接docker-mysql了root root
************************************************************************
参数说明
-p 3306:3306:将容器的 3306 端口映射到主机的 3306 端口
-v 将配置文件夹挂载到主机
-v 将日志文件夹挂载到主机
-v 将配置文件夹挂载到主机
-e MYSQL_ROOT_PASSWORD=root:初始化 root 用户的密码
************************************************************************
docker ps -qa #查看所有容器运行情况
docker rm -f $(docker ps -a -q) #批量删除容器,和批量删镜像一样
************************************************************************
docker exec -it mysql  /bin/bash
whereis mysql
************************************************************************
vi /mydata/mysql/conf/my.cnf
配置mysql
[client]
default-character-set=utf8
[mysql]
default-character-set=utf8
[mysqld]
init_connect='SET collation_connection = utf8_unicode_ci'
init_connect='SET NAMES utf8'
character-set-server=utf8
collation-server=utf8_unicode_ci
skip-character-set-client-handshake
skip-name-resolve
************************************************************************
docker ps
docker restart mysql
6、安装redis
【1】下载镜像
docker pull redis
************************************************************************
mkdir -p /mydata/redis/conf
touch /mydata/redis/conf/redis.conf
************************************************************************
docker run -p 6379:6379 --name redis -v /mydata/redis/data:/data \
-v /mydata/redis/conf/redis.conf:/etc/redis/redis.conf \
-d redis redis-server /etc/redis/redis.conf
************************************************************************
返回成功
5dd435e4b61b3ffad2f3c2039cefadd3b80eaee900abc06322ed491f2390e329
************************************************************************
docker rmi -f mysql:5.6
************************************************************************
配置持久化
vim redis.conf
************************************************************************
appendonly yes
************************************************************************
docker restart redis
************************************************************************
配置完毕!!!!!!!!!!!!!!!!!!!!
7、配置JDK MAVEN
【1】有两处配置
	<mirror>
	<id>nexus-aliyun</id>
	<mirrorOf>central</mirrorOf>
	<name>Nexus aliyun</name>
	<url>http://maven.aliyun.com/nexus/content/groups/public</url>
    </mirror>
************************************************************************
<profiles>!!!!!!!!!!!!!!!!!!!!!!!!!!!!
      <profile>
				<id>jdk-1.8</id>
				<activation>
				<activeByDefault>true</activeByDefault>
				<jdk>1.8</jdk>
				</activation>
				<properties>
				<maven.compiler.source>1.8</maven.compiler.source>
				<maven.compiler.target>1.8</maven.compiler.target>
				<maven.compiler.compilerVersion>1.8</maven.compiler.compilerVersion>
				</properties>
		</profile>
【2】lombok与mybatisx插件下载
【3】前端开发,老师用vscode 我用webstorm
8、配置git-ssh
【1】配置码云
************************************************************************
# 配置用户名
git config --global user.name "wdfgdzx" //(名字)
# 配置邮箱
git config --global user.email "wdfgdzx@163.com" //(注册账号时用的邮箱)
************************************************************************
秘钥的生成
ssh-keygen -t rsa -C "wdfgdzx@163.com"
************************************************************************
cat ~/.ssh/id_rsa.pub  查看秘钥
************************************************************************
复制到码云的这个位置公钥
https://gitee.com/profile/sshkeys
************************************************************************
测试是否配置成功
ssh -T git@gitee.com
yes
9、配置项目提交到码云 14集4分钟
【1】配置IDEA项目
************************************************************************
新版IDEA界面找不到Version Control窗口Local Changes显示的解决方法
File>Settings>Version Control>Commit 去掉勾选 Use non-model commit interface
************************************************************************
安装码云的插件
************************************************************************
用idea提交代码好方便,卧槽!!!!!!!!
15、数据库设置
【1】主要是找到对应的sql
设置docker mysql自动启动(重启后自动启动容器!!!!!!!!!!!!!!)
docker update redis --restart=always
docker update mysql --restart=always
************************************************************************
这个命令删除好用:目的是卸载Linux下的非docker-mysql
yum remove mysql mysql-server mysql-libs compat-mysql51 #移除
chkconfig --list | grep -i mysql #列出
chkconfig --del mysql #删除
whereis mysql #查找
find / -name mysql  #查找
rm -rf $(find / -name mysql)
************************************************************************
mysql -u root -p
use mysql;
select host from user where user='root';
update user set host = '%' where user ='root';
flush privileges;
****************************************************************************************************************************************************************************
三、人人系统
1、搭建后台管理系统:太容易复制错误了,卧槽!!!!!!!!!!!!
2、整合mybatis plus
【1】导入依赖
<!-- mybatis-plus-->
	<dependency>
		<groupId>com.baomidou</groupId>
		<artifactId>mybatis-plus-boot-starter</artifactId>
		<version>3.2.0</version>
	</dependency>
【2】配置,mysql驱动
 <!-- https://mvnrepository.com/artifact/mysql/mysql-connector-java -->
        <dependency>
            <groupId>mysql</groupId>
            <artifactId>mysql-connector-java</artifactId>
            <version>8.0.17</version>
        </dependency>
***************************************************************************************
@MapperScan("com.goods.dao")
***************************************************************************************
spring.application.name=goods
#mysql
spring.datasource.driver-class-name=com.mysql.cj.jdbc.Driver
spring.datasource.url=jdbc:mysql://192.168.0.205:3306/gulimall_pms?useUnicode=true&characterEncoding=UTF-8&serverTimezone=Asia/Shanghai
spring.datasource.username=root
spring.datasource.password=
#mybatis plus # main key auto grow
mybatis-plus.mapper-locations=classpath:/mapper/**/*.xml
mybatis-plus.global-config.db-config.id-type=auto
***************************************************************************************
    <properties>
        <java.version>1.8</java.version>
        <spring-cloud.version>Greenwich.SR3</spring-cloud.version>
    </properties>
spring-cloud版本和springboot不匹配就会报错
Caused by: java.lang.UnsupportedClassVersionError: org/springframework/cloud/
bootstrap/BootstrapApplicationListener has been compiled by a more recent version
of the Java Runtime (class file version 61.0), this version of the Java Runtime only
recognizes class file versions up to 52.0
!!!!!!!!!!!!!!!!!!!!!!!!!!!!!!!!
信阳哥,没有错!!!!!
***************************************************************************************
#\u4EE3\u7801\u751F\u6210\u5668\uFF0C\u914D\u7F6E\u4FE1\u606F
mainPath=com
#\u5305\u540D
package=com
# here change!!!!!!!!!!!!!!!!!!!!!!!!!!!!!!!!!!!!!!
moduleName=coupon
#\u4F5C\u8005
author=wdfgdzx
#Email
email=wdfgdzx@gmail.com
# here change!!!!!!!!!!!!!!!!!!!!!!!!!!!!!!!!!!!!!!
tablePrefix=sms_
3、生成其他项目的增删改查代码  19-2分钟
逆向工程生成一些微服务相关的代码---备份
****************************************************************************************************************************************************************************
四、分布式组件
1、springcloud alibaba简介
【1】微服务---注册中心、配置中心、网关
【2】使用的技术
nacos 注册和配置中心
************************************************************************************
Feign:远程调用服务
************************************************************************************
Sentinel 服务容错(限流、降级、熔断)
************************************************************************************
Gateway
************************************************************************************
Sleuth
************************************************************************************
Seata 分布式事务
2、基本组件配置使用Nacos
source /etc/rc.d/rc.local   一键启动nacos集群,学过就是好,就是妙!!!!!!!!!!!
************************************************************************************
# nacos
spring.cloud.nacos.discovery.server-addr=192.168.0.205:1111   !!!!!!!!!
************************************************************************************
@EnableDiscoveryClient!!!!!!!!!!!!!!!!!!!!
************************************************************************************
注意nacos肯定是先启动的,然后启动xxxApplication即可完成注册
************************************************************************************
spring.application.name=coupon  注意名字也不能少!!!!!!!!
************************************************************************************
2023-06-18 22:42:57.539  INFO 10768 --- [           main] c.a.c.n.registry.NacosServiceRegistry
: nacos registry, coupon 192.168.0.105:7000 register finished
3、都注册到nacos成功后,是否可以远程调用呢?
【1】Feign 使用三步
导包 openfeign!!!!!!!!!!!!!!!!
编写接口,进行远程调用!!!!!!!!!!!!!!!!
开启@EnableFeignClients 功能!!!!!!!!!!!!!!!!
@EnableFeignClients(basePackages = "com.member.feign")
【2】具体Controller的调用
@RequestMapping("/coupons")
public R test() {
	MemberEntity memberEntity = new MemberEntity();
	memberEntity.setNickname("张三");
	R couponEntityList = couponFeignService.memberCoupons(); // 开始远程调用了!!!!!!!!!!!!!!!!!!!!!
	return R.ok().put("member", memberEntity).put("coupons", couponEntityList);
}
************************************************************************************
{"msg":"success","code":0,"coupons":{"msg":"success","code":0,"coupons":[{"id":null,
"couponType":null,"couponImg":null,"couponName":"满100减10元","num":null,"amount
":null,"perLimit":null,"minPoint":null,"startTime":null,"endTime":null,"useType":null,"
note":null,"publishCount":null,"useCount":null,"receiveCount":null,"enableStartTime"
:null,"enableEndTime":null,"code":null,"memberLevel":null,"publish":null}]},"member
":{"id":null,"levelId":null,"username":null,"password":null,"nickname":"张三","mobile
":null,"email":null,"header":null,"gender":null,"birth":null,"city":null,"job":null,"sign"
:null,"sourceType":null,"integration":null,"growth":null,"status":null,"createTime":null}}
************************************************************************************
8000会员-----------远程调用了---------------7000优惠券的服务
4、Nacos作为配置中心 23集0分钟
【1】启动nacos
一个命令启动所有
source /etc/rc.d/rc.local
************************************************************************************
<!--配置中心!!!!!!!!!!!!!!!!!!!!!!!!!!!!!!!!!!!!!!!!!!!!!!!!-->
<dependency>
	<groupId>com.alibaba.cloud</groupId>
	<artifactId>spring-cloud-starter-alibaba-nacos-config</artifactId>
</dependency>
************************************************************************************
bootstrap.properties
*****************************************
spring.application.name=coupon
spring.cloud.nacos.config.server-addr=192.168.0.205:1111
************************************************************************************
@RefreshScope // 刷新配置
@RestController
@RequestMapping("coupon/coupon")
************************************************************************************
 @Value("${name}")
    private String name;

    @RequestMapping("/test")
    public R test() {
        return R.ok().put("name", name);
    }
************************************************************************************
http://localhost:7000/coupon/coupon/test 再访问就固定读取nacos的配置了
************************************************************************************
默认是应用名+.properties
************************************************************************************
@RefreshScope // 刷新配置
************************************************************************************
配置中心和本地都有,优先使用配置中心的配置
5、Nacos作为配置中心的---更多细节
【1】命名空间:是用来做配置隔离
默认:public保留空间、默认新增的所有配置都在public空间
开发、测试、生成可以分别建立一个空间
************************************************************************************
spring.application.name=coupon
spring.cloud.nacos.config.server-addr=192.168.0.205:1111
spring.cloud.nacos.config.namespace=edbcd59d-39ad-46ae-95f4-ed8d3bb8bea4
(edbcd59d-39ad-46ae-95f4-ed8d3bb8bea4指向是开发环境空间)
可以利用命名空间做环境的隔离
更有甚者,每一个微服务也可以创建一个命名空间
************************************************************************************
【2】配置集:所有配置的集合
Data ID  就是配置文件名字
************************************************************************************
【3】配置分组:默认所有的配置集都属于DEFAULT_GROUP
可以通过来切换不通过场景的需要使用的配置文件。
spring.cloud.nacos.config.group=xxxx
************************************************************************************
在老师项目里,每个微服务创建自己的命名空间,再使用分组来区分环境dev test pro
spring.application.name=coupon
spring.cloud.nacos.config.server-addr=192.168.0.205:1111
spring.cloud.nacos.config.namespace=771e24cc-235a-4528-871e-e140c97a0c9b
spring.cloud.nacos.config.group=dev
6、从配置中心中加载多个数据集     25集
【1】读取多个配置文件操作
spring.application.name=coupon
spring.cloud.nacos.config.server-addr=192.168.0.205:1111
spring.cloud.nacos.config.namespace=771e24cc-235a-4528-871e-e140c97a0c9b
spring.cloud.nacos.config.ext-config[0].data-id=coupon.properties
spring.cloud.nacos.config.ext-config[0].group=dev
spring.cloud.nacos.config.ext-config[0].refresh=true
#
spring.cloud.nacos.config.ext-config[1].data-id=datasource.properties
spring.cloud.nacos.config.ext-config[1].group=dev
spring.cloud.nacos.config.ext-config[1].refresh=true
#
spring.cloud.nacos.config.ext-config[2].data-id=mybatis.properties
spring.cloud.nacos.config.ext-config[2].group=dev
spring.cloud.nacos.config.ext-config[2].refresh=true
#
spring.cloud.nacos.config.ext-config[3].data-id=other.properties
spring.cloud.nacos.config.ext-config[3].group=dev
spring.cloud.nacos.config.ext-config[3].refresh=true
************************************************************************************
Springboot任何获取方式都支持
26、API网关
【1】需求
动态路由、重复开发(鉴权、限流服务)
gateway来了。第二代网关框架,取代了Zuul网关
************************************************************************************
【2】如何使用呢?
Route:路由
Predicate:断言
Filter:过滤器
27、使用gateway
【1】建立module,引入包
  <parent>
        <groupId>org.springframework.boot</groupId>
        <artifactId>spring-boot-starter-parent</artifactId>
        <version>2.1.8.RELEASE</version>
        <relativePath/> <!-- lookup parent from repository -->
    </parent>
    <groupId>com.gateway</groupId>
    <artifactId>gateway</artifactId>
    <version>0.0.1-SNAPSHOT</version>
    <name>gateway</name>
    <description>gateway</description>

    <properties>
        <java.version>1.8</java.version>
        <spring-cloud.version>Greenwich.SR3</spring-cloud.version>
    </properties>
************************************************************************************
package com.gateway;

import org.springframework.boot.SpringApplication;
import org.springframework.boot.autoconfigure.SpringBootApplication;
import org.springframework.boot.autoconfigure.jdbc.DataSourceAutoConfiguration;
import org.springframework.cloud.client.discovery.EnableDiscoveryClient;

@EnableDiscoveryClient
// 排除与数据库相关的配置,用不到!!!!!!!! 不排除mybaits p就报错了
@SpringBootApplication(exclude = {DataSourceAutoConfiguration.class})
public class GatewayApplication {
    public static void main(String[] args) {
        SpringApplication.run(GatewayApplication.class, args);
    }
}
【2】区分配置和注册
spring.application.name=gateway
# config start is setting
spring.cloud.nacos.config.server-addr=192.168.0.205:1111
spring.cloud.nacos.config.namespace=d10cfc6b-5dd9-4cde-b2aa-90cc54557b97
spring.cloud.nacos.config.ext-config[0].data-id=gateway.properties
spring.cloud.nacos.config.ext-config[0].group=dev
spring.cloud.nacos.config.ext-config[0].refresh=true
************************************************************************************
server.port=88
# discovery start is reg
spring.cloud.nacos.discovery.server-addr=192.168.0.205:1111
************************************************************************************
【3】正式的配置
server.port=88
spring.application.name=gateway
# discovery start is reg
spring.cloud.nacos.discovery.server-addr=192.168.0.205:1111
# set gateway content
spring.cloud.gateway.routes[0].id=xf_route
spring.cloud.gateway.routes[0].uri=https://www.xfyun.cn/
spring.cloud.gateway.routes[0].predicates[0]=Query=url,xf
# qq
spring.cloud.gateway.routes[1].id=qq_route
spring.cloud.gateway.routes[1].uri=https://www.qq.com
spring.cloud.gateway.routes[1].predicates[0]=Query=url,qq
****************************************************************************************************************************************************************************
五、前端基础
28、技术栈概述
vscode
**********************************************************************************
nodejs
**********************************************************************************
vue
**********************************************************************************
Babel
**********************************************************************************
Webpack
**********************************************************************************
vscode webstorm(巧了,我就用这个  哈哈哈)
29、ES6
【1】js实现的就是ES6
【2】ES6是标准,js是实现
【3】let(只能定义一次) const(常量,无法被改变)
30、解构与字符串
【1】数据解构
let myArray = [1, 2, 3]
const [a, b, c] = myArray
console.log(a, b, c)
**********************************************************************************
【2】对象解构
const person = {
  name: 'zs',
  age: 18
}
const {name, age} = person
console.log(name, age)
**********************************************************************************
重命名
const {name: newName} = person
console.log(newName)
【3】字符串扩展
let str = 'Hello.vue'
console.log(str.startsWith('H'), str.endsWith('e'), str.includes('l'), str.includes('o'))
【4】字符串模板
let myHtml = `
<div style="color:red">
test
</div>
`
**********************************************************************************
let name = 'zs'
let myHtml = `
<div style="color:red">
test-----------------${name}
</div>
`
console.log(myHtml)
**********************************************************************************
计算、调用方法都可以
31、箭头函数
【1】默认值
function test (a, b = 1) { // 默认参数
  return a + b
}

console.log(test(2))
**********************************************************************************
let print = obj => {
  console.log(obj)
}
print('Hello')
**********************************************************************************
let print = obj => {
  console.log(obj)
}
print('Hello')

let sum = (a, b) => {
  console.log(a + b)
}

sum(1, 3)
**********************************************************************************
解构+箭头函数可以一起用
32、对象优化
【1】能够看到对象的全部属性
const person = {
  name: '陈翔',
  age: 12
}
console.log(Object.keys(person), Object.values(person), Object.entries(person))
**********************************************************************************
/*对象的拼接*/
const target = {}
const person1 = {name: 'zs'}
const person2 = {age: 22}
console.log(Object.assign(target, person1, person2))
**********************************************************************************
属性名、属性值变量名一样,可以简写保留一个即可。
**********************************************************************************
let person = {
  name: 'zs',
  eat () {
    console.log(this.name + '在吃饭')
  }
}
person.eat()
**********************************************************************************
【2】对象的扩展运算符
let person = {
  name: 'zs',
  age: 12
}
let someone = {...person} // !!!!!!!!!!!!!!!!!!!!
console.log(someone)
33、ES6----map、reduce语法
【1】用法
let myArray = ['1', '20', '-5', '3']
myArray = myArray.map((temp) => {
  return temp * 2
})
console.log(myArray)
let res = myArray.reduce((a, b) => {
  console.log('上次处理后' + a)
  console.log('当前正在处理的值' + b)
  return a + b
})
console.log(res)
【2】感觉forEach更好用呢,卧槽
34、promise异步编排
【1】避免回调地狱,其实现实中能有多少次调用呢,不过也是一种方式
【2】作为了解和备用
35、模块化
export 导出
import 导入
**********************************************************************************
export {name,age,show}

import {name,age,show} from './user.js'
**********************************************************************************
36、前端基础-VUE与HelloWorld
【1】MVVM
只要我们 Model 发生了改变,View 上自然就会表现出来。
当用户修改了 View,Model 中的数据也会跟着改变。
<template>
  <div class="Test-container">
    <h2>Test</h2>
    <input type="text" v-model="num"></input>
    {{name}}
    {{num}}个人为他点赞
  </div>
</template>

<script>
  export default {
    name: 'Test',
    data () {
      return {
        name: '陈翔',
        num: 1
      }
    }
  }
</script>

<style scoped>
</style>
**********************************************************************************
37、基本语法与插件安装
【1】更深的双向绑定...噗嗤
<template>
  <div class="Test-container">
    <h2>Test</h2>
    <input type="text" v-model="num"></input>
    {{name}}
    {{num}}个人为他点赞
    <button @click="num++">我来点赞</button>
  </div>
</template>

<script>
  export default {
    name: 'Test',
    data () {
      return {
        name: '陈翔',
        num: 1
      }
    }
  }
</script>

<style scoped>
</style>
【2】插件
语法提示插件:webstorm都不需要,这就叫专业
vue.js devtools的配置
**********************************************************************************
38、VUE指令的概述
 msg: '<h1>Hello</h1>'
【1】{{}}插值表达式,存在插值闪烁问题
    {{msg}}
【2】v-html
	<span v-html="msg"></span>
【3】v-bind  给属性绑定值,动态绑定属性值
比如a标签的href,简写是:href
:class也可以用
:class="{class1:class1Flag,class2:class2Flag}"
:style="{color:colorValue;fontSize:fontSize}"
**********************************************************************************
【4】v-model   常用语表单项
<template>
  <div class="Test-container">
    <div id="app">
      精通的语言:<br/>
      <input type="checkbox" v-model="lang" value="java">java<br/>
      <input type="checkbox" v-model="lang" value="php">php<br/>
      <input type="checkbox" v-model="lang" value="python">python<br/>
      选中了{{lang}}
    </div>
  </div>
</template>

<script>
  export default {
    name: 'Test',
    data () {
      return {
        lang: []
      }
    }
  }
</script>

<style scoped>
</style>
**********************************************************************************
39、其他指令
【1】v-on:xxx @click 点击简写
@click.stop
@click.prevent
@click.once  点击一次
【2】按键修饰符
@keyup.up
@keyup.enter
【3】v-for 遍历循环
<template>
  <div class="Test-container">
    <div>
      <ul>
        <li v-for="(item,index) in list" :key="index">
          {{item}} "************************"
        </li>
      </ul>
    </div>
  </div>
</template>

<script>
  export default {
    name: 'Test',
    data () {
      return {
        list: [1, 2, 3, 4, 5]
      }
    }
  }
</script>

<style scoped>
</style>
【4】v-if v-show  控制是否展示,使用场景有点不同
**********************************************************************************
40、计算属性和侦听器
【1】computed计算属性
<template>
  <div class="Test-container">
    书籍价格:{{price}} <input type="number" v-model="num"></input>
    总价格:{{totalPrice}}
  </div>
</template>

<script>
  export default {
    name: 'Test',
    data () {
      return {
        price: 18,
        num: 1
      }
    },
    computed: {
      totalPrice () {
        return this.price * this.num
      }
    }
  }
</script>

<style scoped>
</style>
**********************************************************************************
【3】监听器  watch
<template>
  <div class="Test-container">
    书籍价格:{{price}} <input type="number" v-model="num"></input>
    总价格:{{totalPrice}} 提示:{{msg}}
  </div>
</template>

<script>
  export default {
    name: 'Test',
    data () {
      return {
        price: 18,
        num: 1,
        msg: ''
      }
    },
    computed: {
      totalPrice () {
        return this.price * this.num
      }
    },
    watch: {
      num (newVal, oldVal) {
        if (newVal >= 3) {
          this.msg = '库存不够'
          this.num = 3
        } else {
          this.msg = ''
        }
      }
    }
  }
</script>

<style scoped>
</style>
【4】三元运算符、过滤器(分为局部和全局过滤器)
filters:{
}
**********************************************************************************
41、VUE组件化
【1】比如uniapp的登录、登录后页面、商品详情组件等等
【2】我理解有点类似于页面的嵌如和传值。父传子、子传父的
【3】components 、template包裹、data不用函数了。第一使用的属性是props传递
**********************************************************************************
42、生命周期和钩子函数
【1】生命周期
beforeCreate
created
mounted
updated
**********************************************************************************
43、使用VUE脚手架进行开发
【1】安装全局包
npm i webpack -g
npm i -g @vue/cli-init
**********************************************************************************
【2】vue init webpack vue-demo
【3】项目结构概述
44、使用ElementUI快速开发
【1】安装
npm i element-ui -S
**********************************************************************************
【2】container布局的使用与体验
https://element.eleme.cn/#/zh-CN/component/container
【3】主题布局与菜单点击就是后台管理的重要内容
****************************************************************************************************************************************************************************
六、商品服务API三级
45、三级分类代码实现
package com.goods.service.impl;
import org.springframework.stereotype.Service;
import java.util.List;
import java.util.Map;
import java.util.stream.Collectors;

import com.baomidou.mybatisplus.core.conditions.query.QueryWrapper;
import com.baomidou.mybatisplus.core.metadata.IPage;
import com.baomidou.mybatisplus.extension.service.impl.ServiceImpl;
import com.common.utils.PageUtils;
import com.common.utils.Query;

import com.goods.dao.CategoryDao;
import com.goods.entity.CategoryEntity;
import com.goods.service.CategoryService;

import javax.annotation.Resource;


@Service("categoryService")
public class CategoryServiceImpl extends ServiceImpl<CategoryDao, CategoryEntity> implements CategoryService {

 /*   @Resource
    CategoryDao categoryDao;*/

    @Override
    public PageUtils queryPage(Map<String, Object> params) {
        IPage<CategoryEntity> page = this.page(
                new Query<CategoryEntity>().getPage(params),
                new QueryWrapper<CategoryEntity>()
        );

        return new PageUtils(page);
    }

    @Override
    public List<CategoryEntity> listWithTree() {
        // 1、查出所有分类   baseMapper指向的就是CategoryDao
        List<CategoryEntity> categoryEntityList = baseMapper.selectList(null);
        // 2、组装成父子的属性结构
        // 2.1 找1级分类
        List<CategoryEntity> level1Menu = categoryEntityList.stream().filter(temp -> {
            return temp.getParentCid() == 0;
        }).map(menu -> {
            menu.setChildrenList(getChildrenList(menu, categoryEntityList));
            return menu;
        }).sorted((menu1, menu2) -> {
            return (menu1.getSort() == null ? 0 : menu1.getSort()) - (menu2.getSort() == null ? 0 : menu2.getSort());
        }).collect(Collectors.toList());
        return level1Menu;
    }

    private List<CategoryEntity> getChildrenList(CategoryEntity categoryEntityRoot, List<CategoryEntity> categoryEntityListAll) {
        List<CategoryEntity> categoryEntityChildrenList = categoryEntityListAll.stream().filter(categoryEntity -> {
            return categoryEntity.getParentCid() == categoryEntityRoot.getCatId();
        }).map(categoryEntity -> {
            categoryEntity.setChildrenList(getChildrenList(categoryEntity, categoryEntityListAll));
            return categoryEntity;
        }).sorted((menu1, menu2) -> {
            return (menu1.getSort() == null ? 0 : menu1.getSort()) - (menu2.getSort() == null ? 0 : menu2.getSort());
        }).collect(Collectors.toList());
        return categoryEntityChildrenList;
    }
}
*********************************************************************************************
46、后台管理系统维护三级分类的增删改查 46集
【1】启动renrenfast
  application:
    name: renren-fast
  cloud:
    nacos:
      discovery:
        server-addr: 192.168.0.205:1111
*********************************************************************************************
【2】springboot和nacos的版本至关重要!!!!!!!!!!!!!!!!!!!!!!!!
 <parent>
        <groupId>org.springframework.boot</groupId>
        <artifactId>spring-boot-starter-parent</artifactId>
        <version>2.1.8.RELEASE</version>
    </parent>
*********************************************************************************************
# admin_route  这个配置很重要!!!!!!!!!!!曾经浪费过时间
spring.cloud.gateway.routes[2].id=admin_route
spring.cloud.gateway.routes[2].uri=lb://renren-fast
spring.cloud.gateway.routes[2].predicates[0]=Path=/api/**
spring.cloud.gateway.routes[2].filters[0]=RewritePath=/api/(?<segment>.*),/renren-fast/$\{segment}
*********************************************************************************************
47、解决跨域问题
【1】使用nginx部署为同一域
【2】服务器配置响应头
【3】需要把renren-fast自带的跨域配置删除,不然就重复配置了,网关配置一份即可
48、三级菜单树形结构的展示
【1】重难点还是88网关的配置,别的都OK
49、三级分类-删除-页面效果
【1】主要是前端页面的调用
<template>
  <div class="category-container">
    <!--<h2>category</h2>-->
    <el-tree :data="data" :props="defaultProps" @node-click="handleNodeClick"
             :expand-on-click-node="false"
             show-checkbox
             node-key="catId">
      <!--删除和添加-->
      <span class="custom-tree-node" slot-scope="{ node, data }">
        <span>{{ node.label }}</span>
        <span>
          <!--追加-->
          <el-button v-if="node.level<=2"
                     type="text"
                     size="mini"
                     @click="() => append(data)">Append</el-button>
          <!--删除-->
          <el-button v-if="node.childNodes.length==0"
                     type="text"
                     size="mini"
                     @click="() => remove(node, data)">Delete</el-button>
        </span>
      </span>
    </el-tree>
  </div>
</template>

<script>
  export default {
    name: 'category',
    data () {
      return {
        data: [],
        defaultProps: {
          children: 'childrenList',
          label: 'name'
        }
      }
    },
    created () {
      this.getMenus()
    },
    methods: {
      append (data) {
        console.log(data)
      },
      remove (node, data) {
        console.log('remove', node, data)
      },
      getMenus () {
        this.$http.post('http://localhost:88/api/goods/category/list_tree', {}).then(res => {
          // console.log(res)
          if (res.status === 200) {
            this.data = res.data.data
          }
        })
      },
      handleNodeClick (data) {
        console.log(data)
      }
    }
  }
</script>

<style scoped>

</style>
*********************************************************************************************
50、实现逻辑删除
【1】具体实现
#mybatis plus # main key auto grow。  global delete rules
mybatis-plus.mapper-locations=classpath:/mapper/**/*.xml
mybatis-plus.global-config.db-config.id-type=auto
mybatis-plus.global-config.db-config.logic-delete-value=1
mybatis-plus.global-config.db-config.logic-not-delete-value=0
*********************************************************************************************
    /**
     * 是否显示[0-不显示,1显示]
     */
    @TableLogic!!!!!!!!!!!!!!!!!!!
    private Integer showStatus;
*********************************************************************************************
    @TableLogic(value = "1", delval = "0")
    private Integer showStatus;
*********************************************************************************************
51、点击删除,发送请求逻辑删除数据
【1】主要是前端效果的展示
default-expanded-keys="expandKeyList"
【2】方法里的操作
if (res.status === 200) {
  //  console.log('删除成功')
  this.$message.success('删除成功!')
  this.getMenus() // 更新界面数据
  // 设置默认展开的菜单
  this.expandKeyList = [node.parent.data.catId]
}
【3】还原所有数据
update pms_category set show_status=1
*********************************************************************************************
52、点击Append新增子分类
【1】对话框效果
   addCategory () { // 添加分类
        // console.log('提交的数据' + JSON.stringify(this.send))
        this.$http.post('http://localhost:88/api/goods/category/save', this.send).then(res => {
          if (res.status === 200) {
            this.$message.success('添加成功!')
            this.dialogFlag = false // 关闭对话框
            this.getMenus() // 更新界面数据
            this.expandKeyList = [this.send.parentCid]      // 设置默认展开的菜单
          }
        })
      },
      append (data) {
        //  console.log(data)
        this.dialogFlag = true
        this.send.parentCid = data.catId // 父级id
        this.send.catLevel = data.catLevel * 1 + 1 // 层级
      },
*********************************************************************************************
53、三级分类修改功能
【1】实现修改功能
老师的前端会,但是不专业,不应该奔着简单去吗?????
*********************************************************************************************
  submitData () {
        if (this.dialogType == 'add') {
          this.addCategory()
        }
        if (this.dialogType == 'edit') {
          this.editCategory()
        }
      },
*********************************************************************************************
   edit (data) {
        // console.log('要修改的数据', data)
        this.dialogType = 'edit'
        this.dialogTitle = '修改分类'
        // 发送请求,获取最新数据
        //  this.send.catId = data.catId
        this.$http.post(`http://localhost:88/api/goods/category/info/${data.catId}`, {}).then(res => {
          // console.log(res)
          this.send.name = res.data.data.name
          this.send.catId = res.data.data.catId
          this.send.icon = res.data.data.icon
          this.send.productUnit = res.data.data.productUnit
          this.dialogFlag = true
        })
      },
*********************************************************************************************
54、拖拽效果
【1】可拖拽,但不能乱拖拽
draggable
*********************************************************************************************
 :default-expanded-keys="expandKeyList" draggable :allow-drop="allowDrop">
差之毫厘,谬以千里!!!!!!!!!!!!!!
*********************************************************************************************
  allowDrop (draggingNode, dropNode, type) {
        // 判断被拖动的当前节点,以及所在的父节点,总层数不能大于3
        // console.log('打印看下' + draggingNode, dropNode, type)
        this.countNodeLevel(draggingNode.data) // 执行它是为了获取this.maxLevel的值
        let deep = (this.maxLevel - draggingNode.data.catLevel) + 1
        if (type == 'inner') {
          return (deep + dropNode.level) <= 3
        } else {
          return (deep + dropNode.parent.level) <= 3
        }
      },
      countNodeLevel (node) {
        // 找到所有子节点
        if (node.childrenList != null && node.childrenList > 0) {
          for (let i = 0; i < node.childrenList.length; i++) {
            if (node.childrenList[i].catLevel > this.maxLevel) {
              this.maxLevel = node.childrenList[i].catLevel // 不断获取最大值
            }
            this.countNodeLevel(node.childrenList[i]) // 递归
          }
        }
      },
*********************************************************************************************
55、拖拽数据收集
【1】node-drop 拖拽成功时触发事件
  handleDrop (draggingNode, dropNode, dropType, ev) {
        console.log('tree drop: ', dropNode.label, dropType)
        // 最新父节点id
        let pCid = 0
        let siblings = null
        if (dropType == 'before' || dropType == 'after') {
          pCid = dropNode.parent.data.catId == undefined ? 0 : dropNode.parent.data.catId // 三元表达式
          siblings = dropNode.parent.childNodes
        } else {
          pCid = dropNode.data.catId
          siblings = dropNode.childNodes
        }
        // 当前拖拽的最新顺序
        for (let i = 0; i < siblings.length; i++) {
          if (siblings[i].data.catId == draggingNode.data.catId) { // 如果是当前正在拖拽的节点
            let catLevel = draggingNode.level
            if (siblings[i].data.catLevel != draggingNode.level) { // 当前节点层级发生变化
              if (dropType == 'before' || dropType == 'after') {
                catLevel = dropNode.level
              } else {
                catLevel = dropNode.level + 1
              }
              // 同时需要修改子节点的层级
              this.updateChildNodeLevel(siblings[i])
              this.updateNodes.push({
                catId: siblings[i].data.catId,
                sort: i,
                parentCid: pCid,
                catLevel: catLevel
              })
            }
            this.updateNodes.push({
              catId: siblings[i].data.catId,
              sort: i,
              parentCid: pCid,
              catLevel: catLevel
            })
          } else { // 兄弟元素只改顺序
            this.updateNodes.push({
              catId: siblings[i].data.catId,
              sort: i
            })
          }
        }
        console.log(this.updateNodes)
        // 当前拖拽节点的最新层级

      },
      updateChildNodeLevel (node,) {
        if (node.childNodes.length > 0) {
          for (let i = 0; i < node.childNodes.length; i++) {
            let cNode = node.childNodes[i].data
            this.updateNodes.push({
              catId: cNode.catId,
              catLevel: node.childNodes[i].level
            })
            this.updateChildNodeLevel(node.childNodes[i])
          }
        }
      },
      allowDrop (draggingNode, dropNode, type) {
        // 判断被拖动的当前节点,以及所在的父节点,总层数不能大于3
        // console.log('打印看下' + draggingNode, dropNode, type)
        this.countNodeLevel(draggingNode.data) // 执行它是为了获取this.maxLevel的值
        let deep = (this.maxLevel - draggingNode.data.catLevel) + 1
        if (type == 'inner') {
          return (deep + dropNode.level) <= 3
        } else {
          return (deep + dropNode.parent.level) <= 3
        }
      },
      countNodeLevel (node) {
        // 找到所有子节点
        if (node.childrenList != null && node.childrenList > 0) {
          for (let i = 0; i < node.childrenList.length; i++) {
            if (node.childrenList[i].catLevel > this.maxLevel) {
              this.maxLevel = node.childrenList[i].catLevel // 不断获取最大值
            }
            this.countNodeLevel(node.childrenList[i]) // 递归
          }
        }
      },
*********************************************************************************************
这个从难度来说可以说是最复杂的了
*********************************************************************************************
56、拖拽功能完成
【1】批量修改
   // 当前拖拽节点的最新层级
        this.$http.post(`http://localhost:88/api/goods/category/update_sort_list`, this.updateNodes).then(res => {
          if (res.status == 200) {
            this.$message.success('菜单数据修改成功')
            this.getMenus() // 更新界面数据
            this.expandKeyList = [pCid]      // 设置默认展开的菜单
            this.updateNodes = [] // 初始化
            this.maxLevel = 0 // 初始化
          }
        })
*********************************************************************************************
学完快哭了,老师还是牛批!!!!!!!!!!!!
*********************************************************************************************
57、批量拖拽效果  00
【1】添加个拖拽开关
【2】批量保存的功能,老师魔怔了,一直讲这个...
58、批量删除功能
【1】批量删除与更新菜单,没有什么特殊需要强调的点...
****************************************************************************************************************************************************************************
七、品牌管理API
59、使用逆向工程的前端代码
【1】brand.vue   brand-add-or-update.vue 自动生成的,而且携带数据库备注说明,
很强大!!!!
60、效果优化与快速显示开关
【1】开关的使用,注意加的    :active-value="1"  :inactive-value="0"
  <el-switch @change="updateBrandStatus(scope.row)"
                     v-model="scope.row.showStatus"
                     :active-value="1"
                     :inactive-value="0"
                     active-color="#13ce66"
                     inactive-color="#ff4949">
          </el-switch>
【2】专业的人还是讲的透彻,牛批!!!!!!!!!!!
61、品牌LOGO的文件上传功能 0分
【1】文件存储解决方案
浏览器---N个商品服务---文件存储---自建服务器(FastDFS维护成本高)/云存储(阿里oss 七牛云...)
【2】以使用阿里云存储为例
https://oss.console.aliyun.com/bucket
【3】客户端上传前,先问自己服务端要防伪签名,然后前端带着防伪签名+要提交文件,直接访问
阿里云。这样文件就不用过自己服务器了,不然这些文件太大,就影响服务器性能了。
62、使用代码操作上传
【1】依赖
 <!--阿里云对象存储-->
        <dependency>
            <groupId>com.aliyun.oss</groupId>
            <artifactId>aliyun-sdk-oss</artifactId>
            <version>3.15.1</version>
        </dependency>
【2】上传测试代码
 @Test
public void testUpload() throws ClientException {
	// Endpoint以华东1(杭州)为例,其它Region请按实际情况填写。
	String endpoint = "oss-cn-hangzhou.aliyuncs.com";
	String accessKeyId = "LTAI5tFGD4HdpfPRZM8Y2Rzz";
	String accessKeySecret = "7E6pDXmnEYBbADrBjSkoWsjTgnSa9V";
	String filePath = "src/main/resources/1.jpg";
	// 创建OSSClient实例。
	OSS ossClient = new OSSClientBuilder().build(endpoint, accessKeyId, accessKeySecret);
	// 填写Bucket名称
	String bucketName = "wdfgdzx2023";
	String objectName = "1.jpg";
	try {
		InputStream inputStream = new FileInputStream(filePath);
		// 创建PutObjectRequest对象。
		PutObjectRequest putObjectRequest = new PutObjectRequest(bucketName, objectName, inputStream);
		// 创建PutObject请求。
		PutObjectResult result = ossClient.putObject(putObjectRequest);
	} catch (OSSException oe) {
		System.out.println("Caught an OSSException, which means your request made it to OSS, "
				+ "but was rejected with an error response for some reason.");
		System.out.println("Error Message:" + oe.getErrorMessage());
		System.out.println("Error Code:" + oe.getErrorCode());
		System.out.println("Request ID:" + oe.getRequestId());
		System.out.println("Host ID:" + oe.getHostId());
	} catch (FileNotFoundException e) {
		e.printStackTrace();
	} finally {
		if (ossClient != null) {
			ossClient.shutdown();
			System.out.println("上传完成");
		}
	}
}
【3】使用springcloud alibaba
  <!--阿里云对象存储oss-->
        <dependency>
            <groupId>com.alibaba.cloud</groupId>
            <artifactId>spring-cloud-starter-alicloud-oss</artifactId>
        </dependency>
***************************************************************************************
# aliyun oss
spring.cloud.alicloud.access-key=LTAI5tFGD4HdpfPRZM8Y2Rzz
spring.cloud.alicloud.secret-key=7E6pDXmnEYBbADrBjSkoWsjTgnSa9V
spring.cloud.alicloud.oss.endpoint=oss-cn-hangzhou.aliyuncs.com
***************************************************************************************
@Resource
OSSClient ossClient;

@Test
public void testUpload() throws Exception {
InputStream inputStream = new FileInputStream("src/main/resources/1.jpg");
// 创建PutObjectRequest对象。
PutObjectRequest putObjectRequest = new PutObjectRequest("wdfgdzx2023", "2.jpg", inputStream);
// 创建PutObject请求。
PutObjectResult result = ossClient.putObject(putObjectRequest);
ossClient.shutdown();
System.out.println("上传完成");
63、OSS获取服务端签名
【1】服务端签名后直接传
package com.third.controller;

import com.aliyun.oss.OSS;
import com.aliyun.oss.OSSClient;
import com.aliyun.oss.OSSClientBuilder;
import com.aliyun.oss.common.utils.BinaryUtil;
import com.aliyun.oss.model.MatchMode;
import com.aliyun.oss.model.PolicyConditions;
import org.springframework.beans.factory.annotation.Value;
import org.springframework.web.bind.annotation.RequestMapping;
import org.springframework.web.bind.annotation.RestController;

import javax.annotation.Resource;
import java.text.SimpleDateFormat;
import java.util.Date;
import java.util.LinkedHashMap;
import java.util.Map;

@RestController
public class OssController {

    @Resource
    OSSClient ossClient;

    @Value("${spring.cloud.alicloud.oss.endpoint}")
    private String endpoint;
    @Value("${spring.cloud.alicloud.oss.bucket}")
    private String bucket;
    @Value("${spring.cloud.alicloud.access-key}")
    private String accessId;

    @RequestMapping("/oss_policy")

    public Map<String, String> oss_policy() {
        String host = "https://" + bucket + "." + endpoint;
        // 设置上传回调URL,即回调服务器地址,用于处理应用服务器与OSS之间的通信。OSS会在文件上传完成后,把文件上传信息通过此回调URL发送给应用服务器。
        // String callbackUrl = "https://192.168.0.0:8888";
        // 设置上传到OSS文件的前缀,可置空此项。置空后,文件将上传至Bucket的根目录下。
        String dateFormat = new SimpleDateFormat("yyyy-MM-dd").format(new Date());
        String dir = dateFormat + "/";

        // 创建ossClient实例。
        try {
            long expireTime = 30;
            long expireEndTime = System.currentTimeMillis() + expireTime * 1000;
            Date expiration = new Date(expireEndTime);
            PolicyConditions policyConds = new PolicyConditions();
            policyConds.addConditionItem(PolicyConditions.COND_CONTENT_LENGTH_RANGE, 0, 1048576000);
            policyConds.addConditionItem(MatchMode.StartWith, PolicyConditions.COND_KEY, dir);

            String postPolicy = ossClient.generatePostPolicy(expiration, policyConds);
            byte[] binaryData = postPolicy.getBytes("utf-8");
            String encodedPolicy = BinaryUtil.toBase64String(binaryData);
            String postSignature = ossClient.calculatePostSignature(postPolicy);

            Map<String, String> respMap = new LinkedHashMap<String, String>();
            respMap.put("accessid", accessId);
            respMap.put("policy", encodedPolicy);
            respMap.put("signature", postSignature);
            respMap.put("dir", dir);
            respMap.put("host", host);
            respMap.put("expire", String.valueOf(expireEndTime / 1000));
            // respMap.put("expire", formatISO8601Date(expiration));
            return respMap;
        } catch (Exception e) {
            // Assert.fail(e.getMessage());
            System.out.println(e.getMessage());
            return null;
        }
    }
}
***************************************************************************************
访问地址:
http://localhost:30000/oss_policy
{"accessid":"LTAI5tFGD4HdpfPRZM8Y2Rzz","policy":"eyJleHBpcmF0aW9uIjoiMjAy
My0wNy0xMFQxMzo0MzoxNy41MjhaIiwiY29uZGl0aW9ucyI6W1siY29udGVudC1s
ZW5ndGgtcmFuZ2UiLDAsMTA0ODU3NjAwMF0sWyJzdGFydHMtd2l0aCIsIiRrZXkiL
CIyMDIzLTA3LTEwLyJdXX0=","signature":"JrmJ8Whxaw7+qsrNu7vyg3XprkU=","
dir":"2023-07-10/","host":"https://wdfgdzx2023.oss-cn-hangzhou.aliyuncs.com","
expire":"1688996597"}
64、前端上传功能的实现
<template>
  <el-dialog
    :title="!dataForm.brandId ? '新增' : '修改'"
    :close-on-click-modal="false"
    :visible.sync="visible">
    <el-form :model="dataForm" :rules="dataRule" ref="dataForm" @keyup.enter.native="dataFormSubmit()"
             label-width="140px">
      <el-form-item label="品牌名" prop="name">
        <el-input v-model="dataForm.name" placeholder="品牌名"></el-input>
      </el-form-item>
      <el-form-item label="品牌logo地址" prop="logo">
        <!--<el-input v-model="dataForm.logo" placeholder="品牌logo地址"></el-input>-->
        <singleUpload v-model="dataForm.logo"></singleUpload>
      </el-form-item>
      <el-form-item label="介绍" prop="descript">
        <el-input v-model="dataForm.descript" placeholder="介绍"></el-input>
      </el-form-item>
      <el-form-item label="显示状态" prop="showStatus">
        <!--  <el-input v-model="dataForm.showStatus" placeholder="显示状态[0-不显示;1-显示]"></el-input>-->
        <el-switch
          v-model="dataForm.showStatus"
          active-color="#13ce66"
          inactive-color="#ff4949">
        </el-switch>
      </el-form-item>
      <el-form-item label="检索首字母" prop="firstLetter">
        <el-input v-model="dataForm.firstLetter" placeholder="检索首字母"></el-input>
      </el-form-item>
      <el-form-item label="排序" prop="sort">
        <el-input v-model="dataForm.sort" placeholder="排序"></el-input>
      </el-form-item>
    </el-form>
    <span slot="footer" class="dialog-footer">
      <el-button @click="visible = false">取消</el-button>
      <el-button type="primary" @click="dataFormSubmit()">确定</el-button>
    </span>
  </el-dialog>
</template>

<script>
  import singleUpload from '@/components/upload/singleUpload'

  export default {
    components: {
      singleUpload
    },
    data () {
      return {
        visible: false,
        dataForm: {
          brandId: 0,
          name: '',
          logo: '',
          descript: '',
          showStatus: '',
          firstLetter: '',
          sort: ''
        },
        dataRule: {
          name: [
            {required: true, message: '品牌名不能为空', trigger: 'blur'}
          ],
          logo: [
            {required: true, message: '品牌logo地址不能为空', trigger: 'blur'}
          ],
          descript: [
            {required: true, message: '介绍不能为空', trigger: 'blur'}
          ],
          showStatus: [
            {required: true, message: '显示状态[0-不显示;1-显示]不能为空', trigger: 'blur'}
          ],
          firstLetter: [
            {required: true, message: '检索首字母不能为空', trigger: 'blur'}
          ],
          sort: [
            {required: true, message: '排序不能为空', trigger: 'blur'}
          ]
        }
      }
    },
    methods: {
      init (id) {
        this.dataForm.brandId = id || 0
        this.visible = true
        this.$nextTick(() => {
          this.$refs['dataForm'].resetFields()
          if (this.dataForm.brandId) {
            this.$http({
              url: this.$http.adornUrl(`/goods/brand/info/${this.dataForm.brandId}`),
              method: 'get',
              params: this.$http.adornParams()
            }).then(({data}) => {
              if (data && data.code === 0) {
                this.dataForm.name = data.brand.name
                this.dataForm.logo = data.brand.logo
                this.dataForm.descript = data.brand.descript
                this.dataForm.showStatus = data.brand.showStatus
                this.dataForm.firstLetter = data.brand.firstLetter
                this.dataForm.sort = data.brand.sort
              }
            })
          }
        })
      },
      // 表单提交
      dataFormSubmit () {
        this.$refs['dataForm'].validate((valid) => {
          if (valid) {
            this.$http({
              url: this.$http.adornUrl(`/goods/brand/${!this.dataForm.brandId ? 'save' : 'update'}`),
              method: 'post',
              data: this.$http.adornData({
                'brandId': this.dataForm.brandId || undefined,
                'name': this.dataForm.name,
                'logo': this.dataForm.logo,
                'descript': this.dataForm.descript,
                'showStatus': this.dataForm.showStatus,
                'firstLetter': this.dataForm.firstLetter,
                'sort': this.dataForm.sort
              })
            }).then(({data}) => {
              if (data && data.code === 0) {
                this.$message({
                  message: '操作成功',
                  type: 'success',
                  duration: 1500,
                  onClose: () => {
                    this.visible = false
                    this.$emit('refreshDataList')
                  }
                })
              } else {
                this.$message.error(data.msg)
              }
            })
          }
        })
      }
    }
  }
</script>
65、表单校验、自定义校验器
【1】这个牛批呀,前端的校验可以用函数
  firstLetter: [
            {
              validator: (rule, value, callback) => {
                if (value === '') {
                  callback(new Error('首字符必须填写'))
                } else if (!/^[a-zA-Z]/.test(value)) {
                  callback(new Error('首字符必须是a-z或A-Z'))
                } else {
                  callback()
                }
              }, trigger: 'blur'
            }
          ],
【2】前端和服务端要同步校验,因为用postman什么的就有风险了
66、JSR303数据校验  0分钟
【1】给bean添加校验注解 @NotBlank
@NotBlank
private String name;
【2】控制器标注 @Valid
public R save(@Valid @RequestBody BrandEntity brand) {
        brandService.save(brand);
        return R.ok();
    }
【3】请求测试
http://localhost:88/api/goods/brand/save
{
    "timestamp": "2023-07-11T14:11:54.731+0000",
    "status": 400,
    "error": "Bad Request",
    "errors": [
        {
            "codes": [
                "NotBlank.brandEntity.name",
                "NotBlank.name",
                "NotBlank.java.lang.String",
                "NotBlank"
            ],
            "arguments": [
                {
                    "codes": [
                        "brandEntity.name",
                        "name"
                    ],
                    "arguments": null,
                    "defaultMessage": "name",
                    "code": "name"
                }
            ],
            "defaultMessage": "不能为空",
            "objectName": "brandEntity",
            "field": "name",
            "rejectedValue": "",
            "bindingFailure": false,
            "code": "NotBlank"
        }
    ],
    "message": "Validation failed for object='brandEntity'. Error count: 1",
    "path": "/goods/brand/save"
}
【4】自定义错误信息
@NotBlank(message = "品牌名不能为空")
private String name;
***************************************************************************************
 "defaultMessage": "不能为空",就变成了--->
 "defaultMessage": "品牌名不能为空",
【5】可以给校验的bean紧跟一个BindingResult bindingResult
  @RequestMapping("/save")
    // @RequiresPermissions("goods:brand:save")
    public R save(@Valid @RequestBody BrandEntity brand, BindingResult bindingResult) {
        if (bindingResult.hasErrors()) {
            Map<String, String> map = new HashMap<>();
            // 获取校验错误结果
            bindingResult.getFieldErrors().forEach((item) -> {
                // 获取到错误提示
                String message = item.getDefaultMessage();
                String field = item.getField();
                map.put(field, message);
            });
            return R.error(400, "提交的数据不合法").put("data", map);
        } else {
            brandService.save(brand);
            return R.ok();
        }
    }
***************************************************************************************
【6】其他错误信息注解
package com.goods.entity;

import com.baomidou.mybatisplus.annotation.TableId;
import com.baomidou.mybatisplus.annotation.TableName;

import java.io.Serializable;
import java.util.Date;

import lombok.Data;
import org.hibernate.validator.constraints.URL;

import javax.validation.constraints.Min;
import javax.validation.constraints.NotBlank;
import javax.validation.constraints.NotEmpty;
import javax.validation.constraints.Pattern;

/**
 * 品牌
 *
 * @author wdfgdzx
 * @email wdfgdzx@gmail.com
 * @date 2023-06-17 21:45:30
 */
@Data
@TableName("pms_brand")
public class BrandEntity implements Serializable {
    private static final long serialVersionUID = 1L;

    /**
     * 品牌id
     */
    @TableId
    private Long brandId;
    /**
     * 品牌名
     */
    @NotBlank(message = "品牌名不能为空")
    private String name;
    /**
     * 品牌logo地址
     */
    @NotEmpty
    @URL(message = "LOGO必须是一个合法的url地址")
    private String logo;
    /**
     * 介绍
     */
    private String descript;
    /**
     * 显示状态[0-不显示;1-显示]
     */
    private Integer showStatus;
    /**
     * 检索首字母
     */
    @NotEmpty
    @Pattern(regexp = "/^[a-zA-Z]$/", message = "检索首字母必须是一个字母")
    private String firstLetter;
    /**
     * 排序
     */
    @NotNull
    @Min(value = 0, message = "排序必须>=0")
    private Integer sort;

}
***************************************************************************************
67、集中处理所有异常的类。统一的异常处理
【1】写个统一的处理类
package com.goods.exception;

import com.common.utils.R;
import lombok.extern.slf4j.Slf4j;
import org.springframework.validation.BindingResult;
import org.springframework.web.bind.MethodArgumentNotValidException;
import org.springframework.web.bind.annotation.ExceptionHandler;
import org.springframework.web.bind.annotation.RestControllerAdvice;

import java.util.HashMap;
import java.util.Map;

/*集中处理所有异常*/
@Slf4j
/*@ResponseBody*/
/*@ControllerAdvice(basePackages = "com.goods.controller")*/
@RestControllerAdvice(basePackages = "com.goods.controller")
public class WdExceptionControllerAdvice {

    @ExceptionHandler(value = MethodArgumentNotValidException.class)
    public R handValidException(MethodArgumentNotValidException e) {
        log.error("数据校验出现问题{},异常类型{}", e.getMessage(), e.getClass());
        BindingResult bindingResult = e.getBindingResult();
        Map<String, String> errorMap = new HashMap<>();
        // 获取校验错误结果
        bindingResult.getFieldErrors().forEach((item) -> {
            // 获取到错误提示
            String message = item.getDefaultMessage();
            String field = item.getField();
            errorMap.put(field, message);
        });
        return R.error(400, "数据校验出现问题").put("data", errorMap);
    }
}
***************************************************************************************
【2】全局异常处理
   // 其他公共异常处理
    @ExceptionHandler(value = Throwable.class)
    public R handException(Throwable throwable) {
        return R.error();
    }
【3】code定义规范:前两位是业务指定,后面三位是错误的指定。使用枚举
package com.common.exception;

public enum BizCodeEnum {
    UNKNOWN_EXCEPTION(10000, "系统未知异常"),
    VALID_EXCEPTION(10001, "参数格式校验失败");

    private int code;
    private String message;

    BizCodeEnum(int code, String message) {
        this.code = code;
        this.message = message;
    }

    public int getCode() {
        return code;
    }

    public String getMessage() {
        return message;
    }
}
***************************************************************************************
返回修改
package com.goods.exception;

import com.common.exception.BizCodeEnum;
import com.common.utils.R;
import lombok.extern.slf4j.Slf4j;
import org.springframework.validation.BindingResult;
import org.springframework.web.bind.MethodArgumentNotValidException;
import org.springframework.web.bind.annotation.ExceptionHandler;
import org.springframework.web.bind.annotation.RestControllerAdvice;

import java.util.HashMap;
import java.util.Map;

/*集中处理所有异常*/
@Slf4j
/*@ResponseBody*/
/*@ControllerAdvice(basePackages = "com.goods.controller")*/
@RestControllerAdvice(basePackages = "com.goods.controller")
public class WdExceptionControllerAdvice {

    @ExceptionHandler(value = MethodArgumentNotValidException.class)
    public R handValidException(MethodArgumentNotValidException e) {
        log.error("数据校验出现问题{},异常类型{}", e.getMessage(), e.getClass());
        BindingResult bindingResult = e.getBindingResult();
        Map<String, String> errorMap = new HashMap<>();
        // 获取校验错误结果
        bindingResult.getFieldErrors().forEach((item) -> {
            // 获取到错误提示
            String message = item.getDefaultMessage();
            String field = item.getField();
            errorMap.put(field, message);
        });
        return R.error(BizCodeEnum.VALID_EXCEPTION.getCode(), BizCodeEnum.VALID_EXCEPTION.getMessage()).put("data", errorMap);
    }

    // 其他公共异常处理
    @ExceptionHandler(value = Throwable.class)
    public R handException(Throwable throwable) {
        return R.error(BizCodeEnum.UNKNOWN_EXCEPTION.getCode(), BizCodeEnum.UNKNOWN_EXCEPTION.getMessage());
    }
}
***************************************************************************************
68、JSR303分组校验... 0分钟
【1】新增时校验规则和修改的时候不一样,给注解不同情况下进行校验
/**
 * 品牌id
 */
@NotNull(message = "修改必须指定品牌id", groups = {UpdateGroup.class})
@Null(message = "新增不能指定id", groups = {InsertGroup.class})
@TableId
private Long brandId;
/**
 * 品牌名
 */
@NotBlank(message = "品牌名不能为空", groups = {InsertGroup.class, UpdateGroup.class})
private String name;
【2】在Controller指定校验的组名
 public R save(@Validated(InsertGroup.class) @RequestBody BrandEntity brand/*, BindingResult bindingResult*/) {
***************************************************************************************
 public R update(@Validated(UpdateGroup.class) @RequestBody BrandEntity brand) {
        brandService.updateById(brand);
        return R.ok();
    }
【3】完整的使用情况
package com.goods.entity;

import com.baomidou.mybatisplus.annotation.TableId;
import com.baomidou.mybatisplus.annotation.TableName;

import java.io.Serializable;

import com.common.valid.InsertGroup;
import com.common.valid.UpdateGroup;
import lombok.Data;
import org.hibernate.validator.constraints.URL;

import javax.validation.constraints.*;

/**
 * 品牌
 *
 * @author wdfgdzx
 * @email wdfgdzx@gmail.com
 * @date 2023-06-17 21:45:30
 */
@Data
@TableName("pms_brand")
public class BrandEntity implements Serializable {
    private static final long serialVersionUID = 1L;

    /**
     * 品牌id
     */
    @NotNull(message = "修改必须指定品牌id", groups = {UpdateGroup.class})
    @Null(message = "新增不能指定id", groups = {InsertGroup.class})
    @TableId
    private Long brandId;
    /**
     * 品牌名
     */
    @NotBlank(message = "品牌名不能为空", groups = {InsertGroup.class, UpdateGroup.class})
    private String name;
    /**
     * 品牌logo地址
     */
    @NotEmpty(groups = {InsertGroup.class})
    @URL(message = "LOGO必须是一个合法的url地址", groups = {InsertGroup.class, UpdateGroup.class})
    private String logo;
    /**
     * 介绍
     */
    private String descript;
    /**
     * 显示状态[0-不显示;1-显示]
     */
    private Integer showStatus;
    /**
     * 检索首字母
     */
    @NotEmpty(groups = {InsertGroup.class})
    @Pattern(regexp = "/^[a-zA-Z]$/", message = "检索首字母必须是一个字母", groups = {InsertGroup.class, UpdateGroup.class})
    private String firstLetter;
    /**
     * 排序
     */
    @NotNull(groups = {InsertGroup.class})
    @Min(value = 0, message = "排序必须>=0", groups = {InsertGroup.class, UpdateGroup.class})
    private Integer sort;

}
【4】默认没有指定分组的校验注解@xxx,如果没指定分组不生效
只会在@Validated生效。而@Validated(InsertGroup.class)情况下没指定分组的就不会生效了。
***************************************************************************************
69、JSR303自定义校验
【1】自己编写一个校验注解
 @MyEnumValue(vals = {0, 1})
    private Integer showStatus;
【2】编写一个自定义的校验器
package com.common.valid;

import javax.validation.Constraint;
import javax.validation.Payload;
import java.lang.annotation.*;

@Documented
@Constraint(
        validatedBy = {MyEnumValueConstraintValidator.class}
)
@Target({ElementType.METHOD, ElementType.FIELD, ElementType.ANNOTATION_TYPE, ElementType.CONSTRUCTOR, ElementType.PARAMETER, ElementType.TYPE_USE})
@Retention(RetentionPolicy.RUNTIME)
public @interface MyEnumValue {
    String message() default "{com.common.valid.MyEnumValue.message}";

    Class<?>[] groups() default {};

    Class<? extends Payload>[] payload() default {};

    int[] vals() default {};
}
【3】关联自定义的校验器和校验注解ValidationMessages.properties
com.common.valid.MyEnumValue.message=必须提交指定的值
【4】写个判断的实现类
package com.common.valid;

import javax.validation.ConstraintValidator;
import javax.validation.ConstraintValidatorContext;
import java.util.HashSet;
import java.util.Set;

public class MyEnumValueConstraintValidator implements ConstraintValidator<MyEnumValue, Integer> {

    private Set<Integer> set = new HashSet<>();

    @Override
    public void initialize(MyEnumValue constraintAnnotation) {
        int[] vals = constraintAnnotation.vals();
        for (int val : vals) {
            set.add(val);
        }
    }

    @Override
    public boolean isValid(Integer integer, ConstraintValidatorContext constraintValidatorContext) {
        if (set.contains(integer)) {
            return true;
        } else {
            return false;
        }
    }
}
【5】测试下,解决中文乱码问题
package com.goods.config; !!!!!!!!!!!!!!!!!!!!!!!

import org.springframework.boot.validation.MessageInterpolatorFactory;
import org.springframework.context.annotation.Configuration;
import org.springframework.context.support.ResourceBundleMessageSource;
import org.springframework.http.converter.HttpMessageConverter;
import org.springframework.http.converter.StringHttpMessageConverter;
import org.springframework.http.converter.json.MappingJackson2HttpMessageConverter;
import org.springframework.validation.Validator;
import org.springframework.validation.beanvalidation.LocalValidatorFactoryBean;
import org.springframework.web.servlet.config.annotation.WebMvcConfigurationSupport;

import java.nio.charset.StandardCharsets;
import java.util.List;

/**
 * 解决ListValue注解返回的message中文乱码问题
 */
@Configuration
public class WebMvnConfig extends WebMvcConfigurationSupport {

    @Override
    protected void extendMessageConverters(List<HttpMessageConverter<?>> converters) {
        // 解决controller返回字符串中文乱码问题
        for (HttpMessageConverter<?> converter : converters) {
            if (converter instanceof StringHttpMessageConverter) {
                ((StringHttpMessageConverter) converter).setDefaultCharset(StandardCharsets.UTF_8);
            } else if (converter instanceof MappingJackson2HttpMessageConverter) {
                ((MappingJackson2HttpMessageConverter) converter).setDefaultCharset(StandardCharsets.UTF_8);
            }
        }
    }

    @Override
    protected Validator getValidator() {
        ResourceBundleMessageSource messageSource = new ResourceBundleMessageSource();
        messageSource.setDefaultEncoding("utf-8");// 读取配置文件的编码格式
        messageSource.setCacheMillis(-1);// 缓存时间,-1表示不过期
        messageSource.setBasename("ValidationMessages");// 配置文件前缀名,设置为Messages,那你的配置文件必须以Messages.properties/Message_en.properties...

        LocalValidatorFactoryBean factoryBean = new LocalValidatorFactoryBean();
        MessageInterpolatorFactory interpolatorFactory = new MessageInterpolatorFactory();
        factoryBean.setMessageInterpolator(interpolatorFactory.getObject());
        factoryBean.setValidationMessageSource(messageSource);
        return factoryBean;
    }
}
【6】测试结果
{
    "msg": "参数格式校验失败",
    "code": 10001,
    "data": {
        "logo": "LOGO必须是一个合法的url地址",
        "showStatus": "必须提交指定的值", !!!!!!!!!!!!!!这就是自定义校验效果!!!
        "sort": "不能为null",
        "firstLetter": "不能为空"
    }
}
我觉得需要这么极致吗?前端校验了,后端还校验,我日哦!!!这得多专业。
***************************************************************************************
validatedBy = {MyEnumValueConstraintValidator.class} 可以指定多个校验实现类
***************************************************************************************
前端功能验证是否正常。我觉得这个是重点。放攻击才需要后端校验吧!!!!
****************************************************************************************************************************************************************************
八、属性分组API
70、SPU与SKU
【1】SPU Stanrd Product Unit 标准化产品单元
iphonex
*************************************************************************************
【2】SKU 具体的版本 颜色 内存 等配置
iphonex 256G 炫酷黑
【3】根据分类查询属性
71、前端组件抽取&父子组件交互
【1】整合到了源码,拿到了巅峰,站在更高的视角看到全栈工作开发的难度
72、获取分类属性分组 0分钟
【1】在pms_attr_group添加数据catelog_id是255即可看到对应的信息
73、分组新增&级联选择器
【1】Element UI的级联选择器的使用!!!!!!!
74、属性分组
【1】主要是一个级联回显和搜索
*************************************************************************************
75、品牌管理分类关联与级联更新
【1】处理分页
package com.atguigu.gulimall.product.config;

import com.baomidou.mybatisplus.extension.plugins.PaginationInterceptor;
import org.mybatis.spring.annotation.MapperScan;
import org.springframework.context.annotation.Bean;
import org.springframework.context.annotation.Configuration;
import org.springframework.transaction.annotation.EnableTransactionManagement;

@Configuration
@EnableTransactionManagement //开启事务
@MapperScan("com.atguigu.gulimall.product.dao")
public class MyBatisConfig {

    //引入分页插件
    @Bean
    public PaginationInterceptor paginationInterceptor() {
        PaginationInterceptor paginationInterceptor = new PaginationInterceptor();
        // 设置请求的页面大于最大页后操作, true调回到首页,false 继续请求  默认false
        paginationInterceptor.setOverflow(true);
        // 设置最大单页限制数量,默认 500 条,-1 不受限制
        paginationInterceptor.setLimit(1000);
        return paginationInterceptor;
    }
}
*************************************************************************************
【2】关联分类功能
老师用了过多的mybatis plus,真的好吗,mysql都忘记完了,沃日,合格吗?
复杂的还是用xxxmaper.xml不嫌麻烦吗,统一用xml不香吗
****************************************************************************************************************************************************************************
九、平台属性API
76、平台属性-规格参数新增与VO
【1】规格参数新增演示
【2】DO领域对象、TO数据传输对象、DTO数据传输对象、VO值对象
【3】VO接收页面传递来的数据,封装对象
将业务处理对象,封装成页面要用的数据
****************************************************************************************
思想和我的思想是很像的,只是比我的清晰,我的是互相包含 哈哈哈哈
****************************************************************************************
我的是统一大代理类,命名为此不为过吧。。。。
****************************************************************************************
77、查询规格参数列表功能
【1】关联查询
78、平台属性-规格修改
【1】AttrServiceImpl功能的修改
79、平台属性-销售属性维护
【1】主要是type的区分
****************************************************************************************
80、平台属性-查询分组关联属性&删除关联
【1】批量删除的mybatis写法
81、平台属性-查询分组未关联的属性
【1】主要修改AttrServiceImpl
【2】只能关联没有关联的,而且移出自己和别人关联过的属性
****************************************************************************************
82、平台属性-增加分组与属性的关联关系
【1】勾选后,确认新增生效。
【2】完成
****************************************************************************************************************************************************************************
十、新增商品
83、新增商品-调试会员等级相关接口
【1】还是重点配置getway的route
84、获取分类关联品牌
【1】Controller只处理请求和校验业务参数,mapper处理传来的数据,进行业务处理
【2】Controller接受处理结果,封装页面指定的对象
******************************************************************************************
【3】处理报错问题,通过百度+旧代码,我竟然解决了问题,牛批,我的哥哥!!!!
import PubSub from 'pubsub-js'

Vue.use(VueCookie)
Vue.config.productionTip = false
Vue.prototype.PubSub = PubSub   //组件发布订阅消息
******************************************************************************************
85、获取分类下所有分组以及属性
【1】根据分类的id查出所有分组和属性
【2】感觉清除了京东、淘宝的上架商品过程,噗嗤,牛批!!!!!!
******************************************************************************************
86、商品新增VO抽取
【1】体现了组合的思想,品牌名+组合内存+组合颜色....
【2】但是能实现到这种程度,也是真的牛批!!!!!太给力了
******************************************************************************************
87、新增商品-商品新增业务流程分析! 0分钟
【1】一次性保存信息的逻辑实现。
88、保存SPU基本信息SpuInfoController!!!!!!!!!!!
【1】saveSpuInfo实现类里面的操作!!!!!!!!!!!!!!!!!!!
//1、保存spu基本信息 pms_spu_info
        SpuInfoEntity infoEntity = new SpuInfoEntity();
        BeanUtils.copyProperties(vo, infoEntity);
        infoEntity.setCreateTime(new Date());
        infoEntity.setUpdateTime(new Date());
        this.saveBaseSpuInfo(infoEntity);

        //2、保存Spu的描述图片 pms_spu_info_desc
        List<String> decript = vo.getDecript();
        SpuInfoDescEntity descEntity = new SpuInfoDescEntity();
        descEntity.setSpuId(infoEntity.getId());
        descEntity.setDecript(String.join(",", decript));
        spuInfoDescService.saveSpuInfoDesc(descEntity);


        //3、保存spu的图片集 pms_spu_images
        List<String> images = vo.getImages();
        imagesService.saveImages(infoEntity.getId(), images);


        //4、保存spu的规格参数;pms_product_attr_value
        List<BaseAttrs> baseAttrs = vo.getBaseAttrs();
        List<ProductAttrValueEntity> collect = baseAttrs.stream().map(attr -> {
            ProductAttrValueEntity valueEntity = new ProductAttrValueEntity();
            valueEntity.setAttrId(attr.getAttrId());
            AttrEntity id = attrService.getById(attr.getAttrId());
            valueEntity.setAttrName(id.getAttrName());
            valueEntity.setAttrValue(attr.getAttrValues());
            valueEntity.setQuickShow(attr.getShowDesc());
            valueEntity.setSpuId(infoEntity.getId());

            return valueEntity;
        }).collect(Collectors.toList());
        attrValueService.saveProductAttr(collect);


        //5、保存spu的积分信息;gulimall_sms->sms_spu_bounds
        Bounds bounds = vo.getBounds();
        SpuBoundTo spuBoundTo = new SpuBoundTo();
        BeanUtils.copyProperties(bounds, spuBoundTo);
        spuBoundTo.setSpuId(infoEntity.getId());
        R r = couponFeignService.saveSpuBounds(spuBoundTo);
        if (r.getCode() != 0) {
            log.error("远程保存spu积分信息失败");
        }
89、保存SKU的基本信息
【1】具体实现逻辑代码
 //5、保存当前spu对应的所有sku信息;
        List<Skus> skus = vo.getSkus();
        if (skus != null && skus.size() > 0) {
            skus.forEach(item -> {
                String defaultImg = "";
                for (Images image : item.getImages()) {
                    if (image.getDefaultImg() == 1) {
                        defaultImg = image.getImgUrl();
                    }
                }
                //    private String skuName;
                //    private BigDecimal price;
                //    private String skuTitle;
                //    private String skuSubtitle;
                SkuInfoEntity skuInfoEntity = new SkuInfoEntity();
                BeanUtils.copyProperties(item, skuInfoEntity);
                skuInfoEntity.setBrandId(infoEntity.getBrandId());
                skuInfoEntity.setCatalogId(infoEntity.getCatalogId());
                skuInfoEntity.setSaleCount(0L);
                skuInfoEntity.setSpuId(infoEntity.getId());
                skuInfoEntity.setSkuDefaultImg(defaultImg);
                //5.1)、sku的基本信息;pms_sku_info
                skuInfoService.saveSkuInfo(skuInfoEntity);

                Long skuId = skuInfoEntity.getSkuId();

                List<SkuImagesEntity> imagesEntities = item.getImages().stream().map(img -> {
                    SkuImagesEntity skuImagesEntity = new SkuImagesEntity();
                    skuImagesEntity.setSkuId(skuId);
                    skuImagesEntity.setImgUrl(img.getImgUrl());
                    skuImagesEntity.setDefaultImg(img.getDefaultImg());
                    return skuImagesEntity;
                }).filter(entity -> {
                    //返回true就是需要,false就是剔除
                    return !StringUtils.isEmpty(entity.getImgUrl());
                }).collect(Collectors.toList());
                //5.2)、sku的图片信息;pms_sku_image
                skuImagesService.saveBatch(imagesEntities);
                //TODO 没有图片路径的无需保存

                List<Attr> attr = item.getAttr();
                List<SkuSaleAttrValueEntity> skuSaleAttrValueEntities = attr.stream().map(a -> {
                    SkuSaleAttrValueEntity attrValueEntity = new SkuSaleAttrValueEntity();
                    BeanUtils.copyProperties(a, attrValueEntity);
                    attrValueEntity.setSkuId(skuId);

                    return attrValueEntity;
                }).collect(Collectors.toList());
                //5.3)、sku的销售属性信息:pms_sku_sale_attr_value
                skuSaleAttrValueService.saveBatch(skuSaleAttrValueEntities);

                // //5.4)、sku的优惠、满减等信息;gulimall_sms->sms_sku_ladder\sms_sku_full_reduction\sms_member_price
                SkuReductionTo skuReductionTo = new SkuReductionTo();
                BeanUtils.copyProperties(item, skuReductionTo);
                skuReductionTo.setSkuId(skuId);
                if (skuReductionTo.getFullCount() > 0 || skuReductionTo.getFullPrice().compareTo(new BigDecimal("0")) == 1) {
                    R r1 = couponFeignService.saveSkuReduction(skuReductionTo);
                    if (r1.getCode() != 0) {
                        log.error("远程保存sku优惠信息失败");
                    }
                }
            });
        }
******************************************************************************************
90、远程调用服务保存优惠等信息
【1】调用过程:@RequestBody将对象转成json---找到服务coupon---将上一步转成的json
放在请求体位置---对方服务coupon收到请求---将json转成entity实体---拿到相关属性值。
package com.atguigu.gulimall.product.feign;

import com.atguigu.common.to.SkuReductionTo;
import com.atguigu.common.to.SpuBoundTo;
import com.atguigu.common.utils.R;
import org.springframework.cloud.openfeign.FeignClient;
import org.springframework.web.bind.annotation.PostMapping;
import org.springframework.web.bind.annotation.RequestBody;

@FeignClient("coupon") !!!!!!!!!!!!!!!!!!!这是微服务名称哦
public interface CouponFeignService {
    /**
     * 1、CouponFeignService.saveSpuBounds(spuBoundTo);
     * 1)、@RequestBody将这个对象转为json。
     * 2)、找到gulimall-coupon服务,给/coupon/spubounds/save发送请求。
     * 将上一步转的json放在请求体位置,发送请求;
     * 3)、对方服务收到请求。请求体里有json数据。
     * (@RequestBody SpuBoundsEntity spuBounds);将请求体的json转为SpuBoundsEntity;
     * 只要json数据模型是兼容的。双方服务无需使用同一个to
     *
     * @param spuBoundTo
     * @return
     */
    @PostMapping("/coupon/spubounds/save")
    R saveSpuBounds(@RequestBody SpuBoundTo spuBoundTo);


    @PostMapping("/coupon/skufullreduction/saveinfo")
    R saveSkuReduction(@RequestBody SkuReductionTo skuReductionTo);
}
******************************************************************************************
【2】总结:只要json数据模型是兼容的,双方服务无需使用同一个POJO
【3】主要还是A服务通过mapper @B服务,通过Controller方法映射调用B服务的方法。当然中间
必不可少的是nacos服务注册和发现。
******************************************************************************************
91、商品保存的debug与测试
【1】我感觉一次性保存很多属性,操作也挺快的
【2】统一开启事务也非常重要
package com.atguigu.gulimall.product.config;

import com.baomidou.mybatisplus.extension.plugins.PaginationInterceptor;
import org.mybatis.spring.annotation.MapperScan;
import org.springframework.context.annotation.Bean;
import org.springframework.context.annotation.Configuration;
import org.springframework.transaction.annotation.EnableTransactionManagement;

@Configuration
@EnableTransactionManagement //开启事务
@MapperScan("com.atguigu.gulimall.product.dao")
public class MyBatisConfig {
    //引入分页插件
    @Bean
    public PaginationInterceptor paginationInterceptor() {
        PaginationInterceptor paginationInterceptor = new PaginationInterceptor();
        // 设置请求的页面大于最大页后操作, true调回到首页,false 继续请求  默认false
        paginationInterceptor.setOverflow(true);
        // 设置最大单页限制数量,默认 500 条,-1 不受限制
        paginationInterceptor.setLimit(1000);
        return paginationInterceptor;
    }
}
******************************************************************************************
92、商品保存的其他细节
【1】远程调用保存的细节代码
******************************************************************************************
93、商品管理-SPU检索
【1】上架状态管理
# time format
spring.jackson.date-format=yyyy-MM-dd HH:mm:ss
【2】高手呀,山外青山楼外楼,西湖歌舞几时休
94、商品管理-SKU检索
【1】主要是后台逻辑的编写!!!!!!!!!!!!!!!!!!
@Override
    public PageUtils queryPageByCondition(Map<String, Object> params) {
        QueryWrapper<SkuInfoEntity> queryWrapper = new QueryWrapper<>();
        /**
         * key:
         * catelogId: 0
         * brandId: 0
         * min: 0
         * max: 0
         */
        String key = (String) params.get("key");
        if (!StringUtils.isEmpty(key)) {
            queryWrapper.and((wrapper) -> {
                wrapper.eq("sku_id", key).or().like("sku_name", key);
            });
        }
        String catelogId = (String) params.get("catelogId");
        if (!StringUtils.isEmpty(catelogId) && !"0".equalsIgnoreCase(catelogId)) {

            queryWrapper.eq("catalog_id", catelogId);
        }
        String brandId = (String) params.get("brandId");
        if (!StringUtils.isEmpty(brandId) && !"0".equalsIgnoreCase(catelogId)) {
            queryWrapper.eq("brand_id", brandId);
        }
        String min = (String) params.get("min");
        if (!StringUtils.isEmpty(min)) {
            queryWrapper.ge("price", min);
        }
        String max = (String) params.get("max");
        if (!StringUtils.isEmpty(max)) {
            try {
                BigDecimal bigDecimal = new BigDecimal(max);

                if (bigDecimal.compareTo(new BigDecimal("0")) == 1) {
                    queryWrapper.le("price", max);
                }
            } catch (Exception e) {

            }
        }
        IPage<SkuInfoEntity> page = this.page(
                new Query<SkuInfoEntity>().getPage(params),
                queryWrapper
        );
        return new PageUtils(page);
    }
}
******************************************************************************************
****************************************************************************************************************************************************************************
十一、仓储服务
95、整合ware服务&获取仓库列表
【1】首先是配置gateway
【2】仓库列表的增删改查,这个比商品新增简单好多
******************************************************************************************
96、查询库存&创建采购需求
【1】WareInfoController、PurchaseDetailController主要是这两个Controller
人工建采购需求/库存预警创建采购需求---人工合并/系统自动合并---分配---采购人员
---采购入库单---添加库存。
【2】和我去年做的库存管理系统,有很多类似的地方,就是入库单、出库单、对应的物品详情。
然后可以操作库存、数量的出入库的操作。
******************************************************************************************
97、合并采购需求
【1】PurchaseController---merge---mergePurchase接口的逻辑实现
******************************************************************************************
98、员工领取采购单-使用postman来模拟终端操作
【1】采购人员领取采购单
http://localhost:88/api/ware/purchase/received
【2】received 功能编写
【3】发送领取的采购单id集合  [1]
{
    "msg": "success",
    "code": 0
}
【4】查询采购单列表,就会变成   已领取!!!!!!!!!!!!!!!!
******************************************************************************************
99、完成采购
【1】采购人员完成采购点击
http://localhost:88/api/ware/purchase/done
【2】请求参数
{
"id":1,
"items":[{
     "itemId":1,
	 "status":3,
	 "reason":""
},{
     "itemId":3,
	 "status":4,
	 "reason":"缺货"
}]
}
【3】返回结果!!!!!!!!!!!!!!!!!
{
    "msg": "success",
    "code": 0
}
******************************************************************************************
100、商品管理-SPU规格维护
【1】AttrController---baseAttrlistforspu接口的逻辑实现
点规格,404,前端改一下:
/src/router/index.js 在mainRoutes->children【】里面加上:
{ path: '/product-attrupdate', component: _import('modules/product/attrupdate'),
name: 'attr-update', meta: { title: '规格维护', isTab: true } }
卧槽,再牛批的人肯定也有bug!!!!!!!!!!!!!!!!
******************************************************************************************
****************************************************************************************************************************************************************************
十二、分布式基础篇总结
101、分布式基础篇总结
【1】分布式基础篇开发结束
【2】微服务:服务独立自治,依赖nacos
注册中心、配置中心nacos;
远程调用Feign  来实现的,springboot简单来说就是使用Feign给对方服务发起个请求
网关:所有请求都是通过网关代理的,这样端口变化时,只要服务名称不变,也不影响请求。
**********************************************************************************************
【3】基础开发
springboot、springcloud、mybatisPlus、Vue组件化、阿里云对象存储
【4】开发环境
Linux、Docker、MySQL、Redis、逆向工程、Vbox
【5】开发规范
JSR303、全局异常处理、全局统一返回Res、全局跨域处理
枚举、业务状态码、VO/TO/PO、逻辑删除
Lombok:@Data、@Slf4j


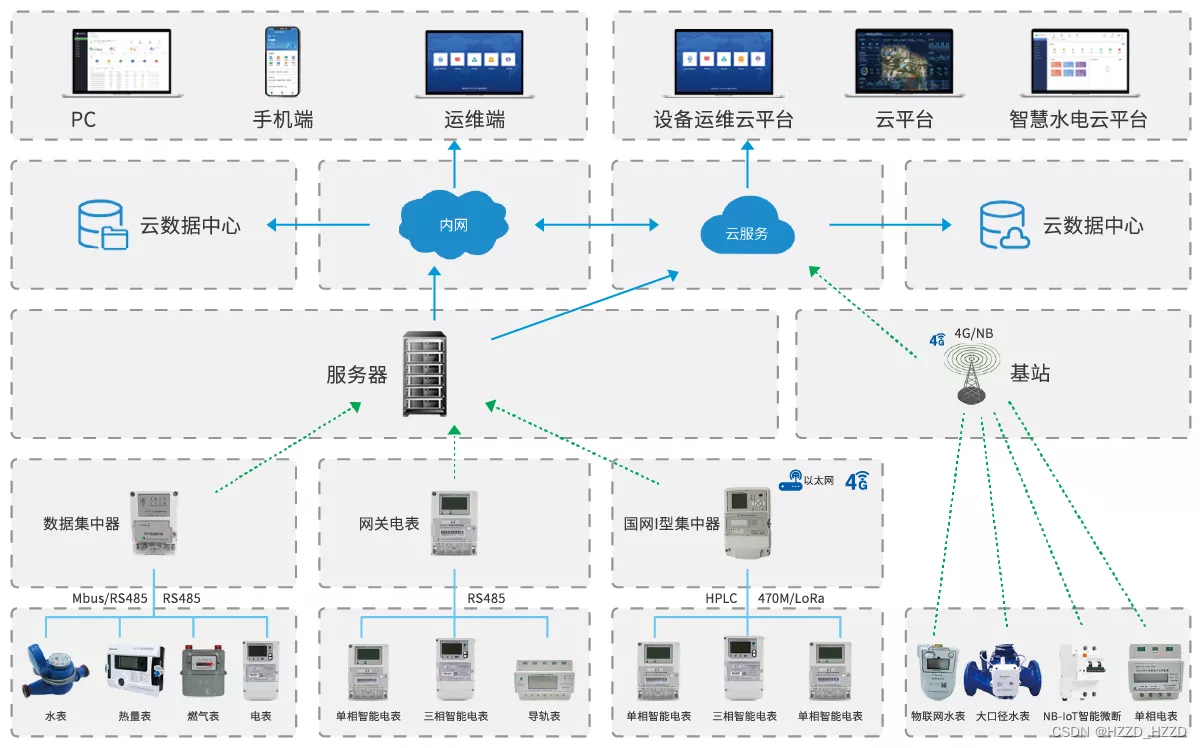


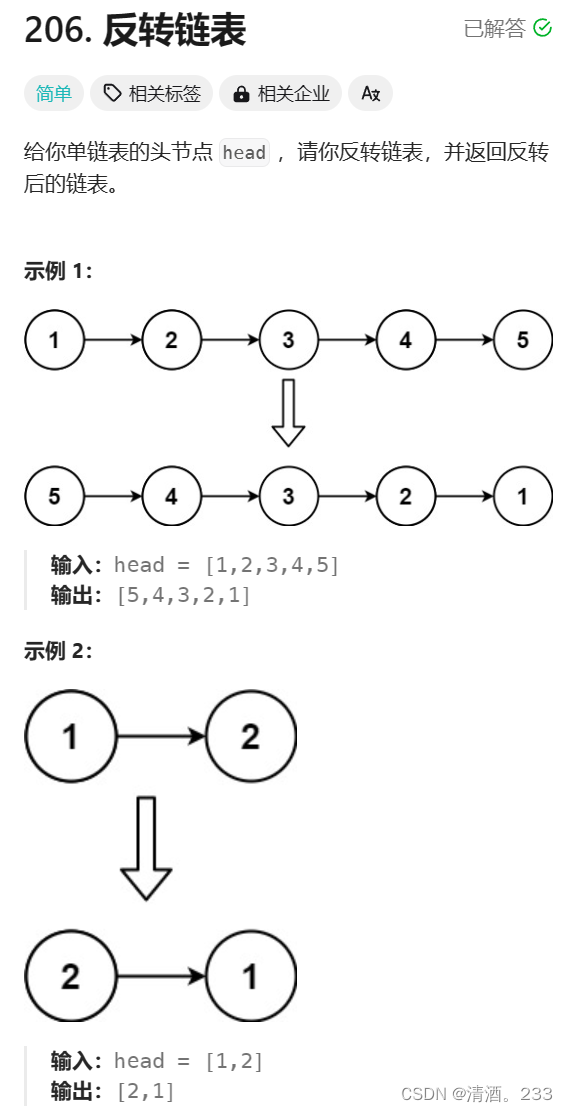


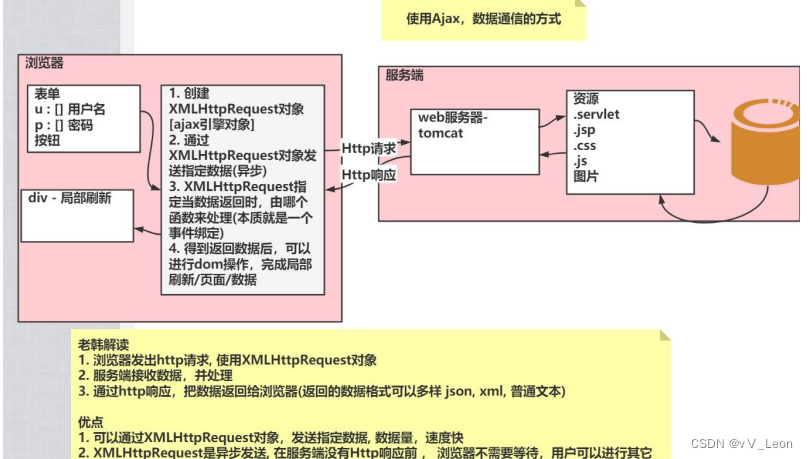
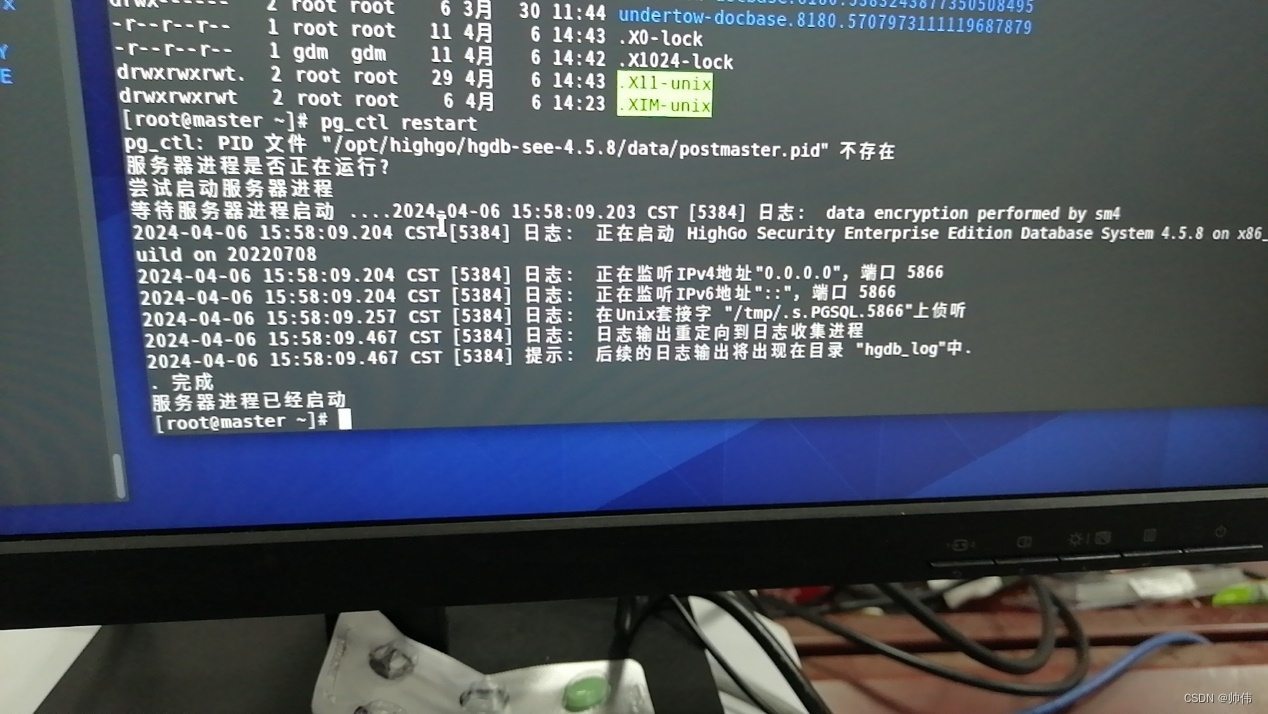


![BUUCTF [极客大挑战 2019]EasySQL 1](https://img-blog.csdnimg.cn/direct/d5f64a03a0f44d1e96c8de9d38765f2e.png)